Examples:
The first line starts with "0File..."; this means "File" is a menu because the next line starts with the higher digit "1". The next line starts with "1New..."; this means "New..." is an entry in the menu "File". This goes down to "1Server Data Import/Export"; all these items are first level entries in the "File" menu.
The next three lines start with the digit "2". This means "Server Data Import/Export" is a submenu containing the three entries "Import...", "Export..." and "Advanced Import...". The latter is a new submenu of the submenu because the next two lines start with the higher digit "3".
Both submenus are ended with the next line "1Undo Check Out..."; the "1" means that this line is an ordinary entry of menu "File".
The last entry in the "File" menu is "Exit" because the next line is "0View", it opens a new menu "View".
The same is with menu "Sketch".
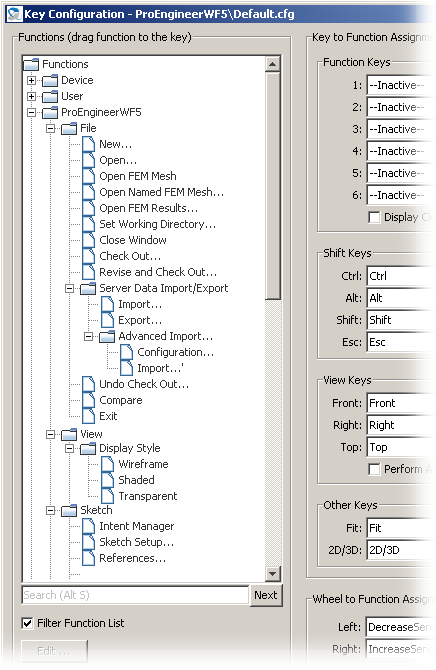
This all leads to the following menu tree structure in the SpaceController's Function Assignment dialog (deletions are not shown in this figure):
Examples:
Look at line
1Compare = {+ 7}ProCmdDwgCompare|Highlight changes between two drawings.
The filter "{+ 7}" means: This menu item is only displayed in mode 7 (i. e. the "Drawing" mode).
In line
0Sketch = {- 2 6 15 23}
the filter "{ - 2 6 15 23 } means: This menu is displayed in all modes but modes 2 (Part), 6 (Assembly), 15 (Markup) and 23 (Default).
Line
0File = {}
has an empty filter. This means: The menu "File" is displayed in all of ProE's modes.
Examples:
Line
1New... = {}ProCmdModelNew|Create a new object
will execute Pro/ENGINEER's command "ProCmdModelNew".
Parameters are also allowed and separated by an asterisk "*":
Line
2Wireframe = {}ProCmdEnvMdlDisp*Wireframe|Displays the object in wireframe mode
will execute the command "ProCmdEnvMdlDisp" with the parameter "Wireframe".
(The separator symbol between command and parameter may differ from application to application.)